新添加配置环境
在项目中,经常需要通过不同的环境来配置环境变量,比如不同的 url、key等等,通过 xcode 的 Edit Scheme 选项来配置 debug/release 环境,如下所示。从而避免修改代码导致的问题。

1 | // ZMConst.h 文件 |
但是一般会涉及到多种环境,仅靠 Xcode 提供的 debug/release 环境是不够的,因此我们还要根据实际需要做一些其它配置。下面我们来配置 local_Liu 和 local_Li 环境:
添加新环境
在 PROJECT --> info 复制 Debug 或 Release对应的配置,并重命名:

这样我们就可以在 Edit Scheme 中看到新添加环境的选项:

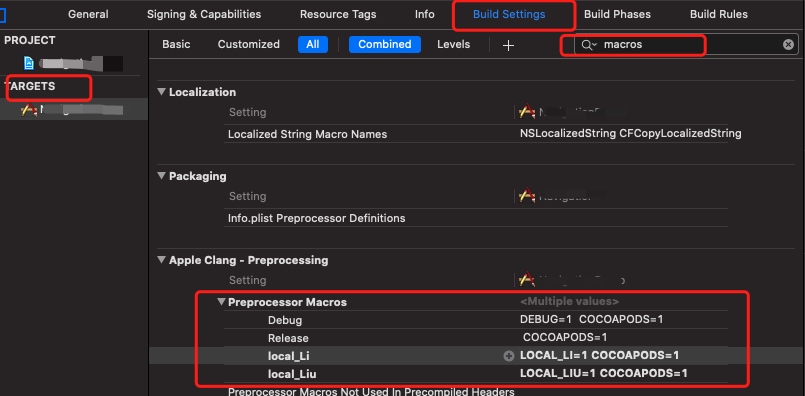
配置新添加环境对应的预编译宏
选择 TARGETS –> Build Settings –> 搜索 macros,添加相关配置。
配置完毕,若是使用cocoapods则需要执行一遍pod install,我们新增的配置与pod的配置进行关联。

预编译宏使用
1 |
|
通过如上步骤配完,在 xcode 的 Edit Scheme –> Build Configuration –> 切换不同的环境,就可以使用不同环境下变量值。
不同环境的个性化配置
配置不同环境对应不同AppName
在 PROJECT 中选择 Add User-Defined Setting 添加 APPNAME ,并设置不同环境对应的 AppName.


把 info.plist 中的 Bundle name 的值设置为:$(APPNAME),使得不同环境的 AppNam 与info.plist中的Bundle name 一项动态绑定。

配置不同的Bundle id
和配置AppName相似,也是 选择 Add User-Defined Setting 添加 BUNDLE_ID 值


让不同环境对应的 Bundle id 与 info.plist 中的 Bundle identifier 一项动态绑定:
把 info.plist 中 Bundle identifier 的值 $(PRODUCT_BUNDLE_IDENTIFIER) 替换为 $(BUNDLE_ID)

配置不同环境对应的AppIcon
首先在 Assets.xcassets 文件中新添加 AppIcon


然后在 TARGETS 中设置不同环境对应的 appIcon:

多Target开发
在项目中,我们往往需要开发多个类似的App,这就需要用到多 Target 开发。多Target开发 与 配置环境变量 有一些相同点,比如:在同一项目中配置不同 AppIcon、Bundle id、AppName等。
多Target开发 与 配置环境变量 最大的区别是:多Target开发可以公用一些文件,也可以单独使用一些文件;而 配置环境变量,只是改变项目中的一些变量参数值,项目文件都是公用的。
下面我们来学习如何创建使用多 Target:
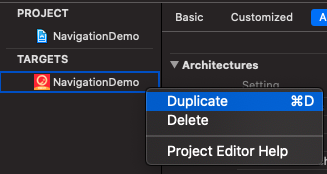
1、创建一个新的 Target
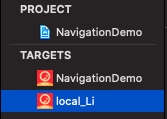
复制一个 Targe 并重新命名


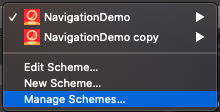
2、修改 Schemes 中新Target对应的名称


每个Target 相当于一个独立的工程,可以对其进行额外的 环境变量配置等等。